Attaching Resolver to Our Mutations and Queries
Now that we have designed our schema, We can create our own backend + database and configure AWS AppSync to work with our backend.
But we can do that with any* Server (including Lambda) what's the point of using AppSync?
We can let AppSync create all the resources for us., It will automatically create a Dynamo DB table for our GraphQL Types.
Continuing from where we stopped previously, Open AWS AppSync, Select the API we created and click on Schema link.
In schema page, at top right section you can see Create Resources button, Clicking on that will open a page (screenshot below) from there we can create resources.
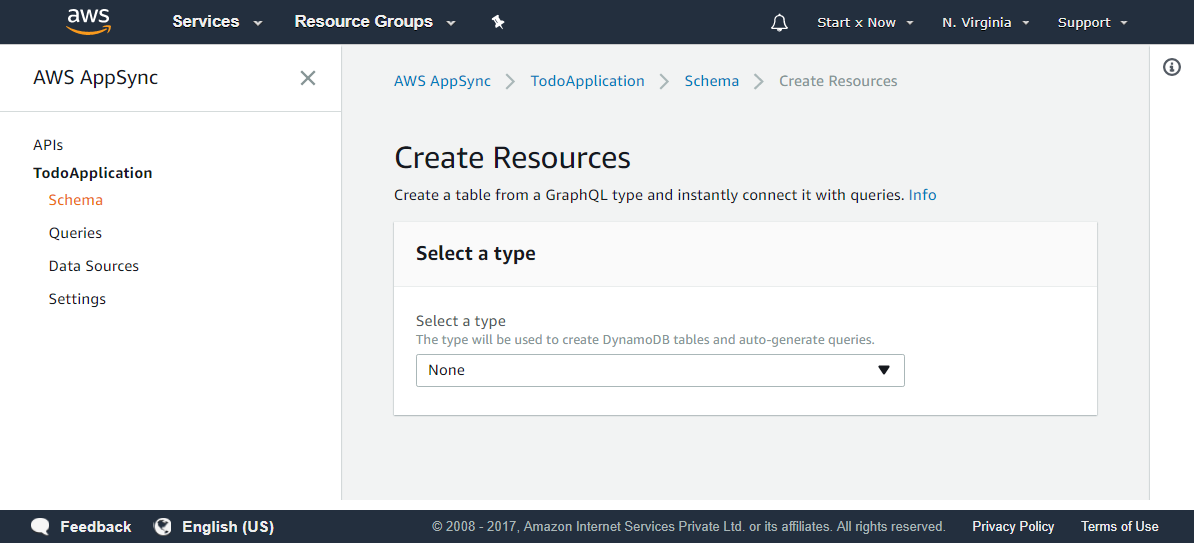
In Select a type Field, We have three options, Item, List and User. These are the three Types we created earlier.
Let's select User from the dropdown., Now we see more options (screenshot below).
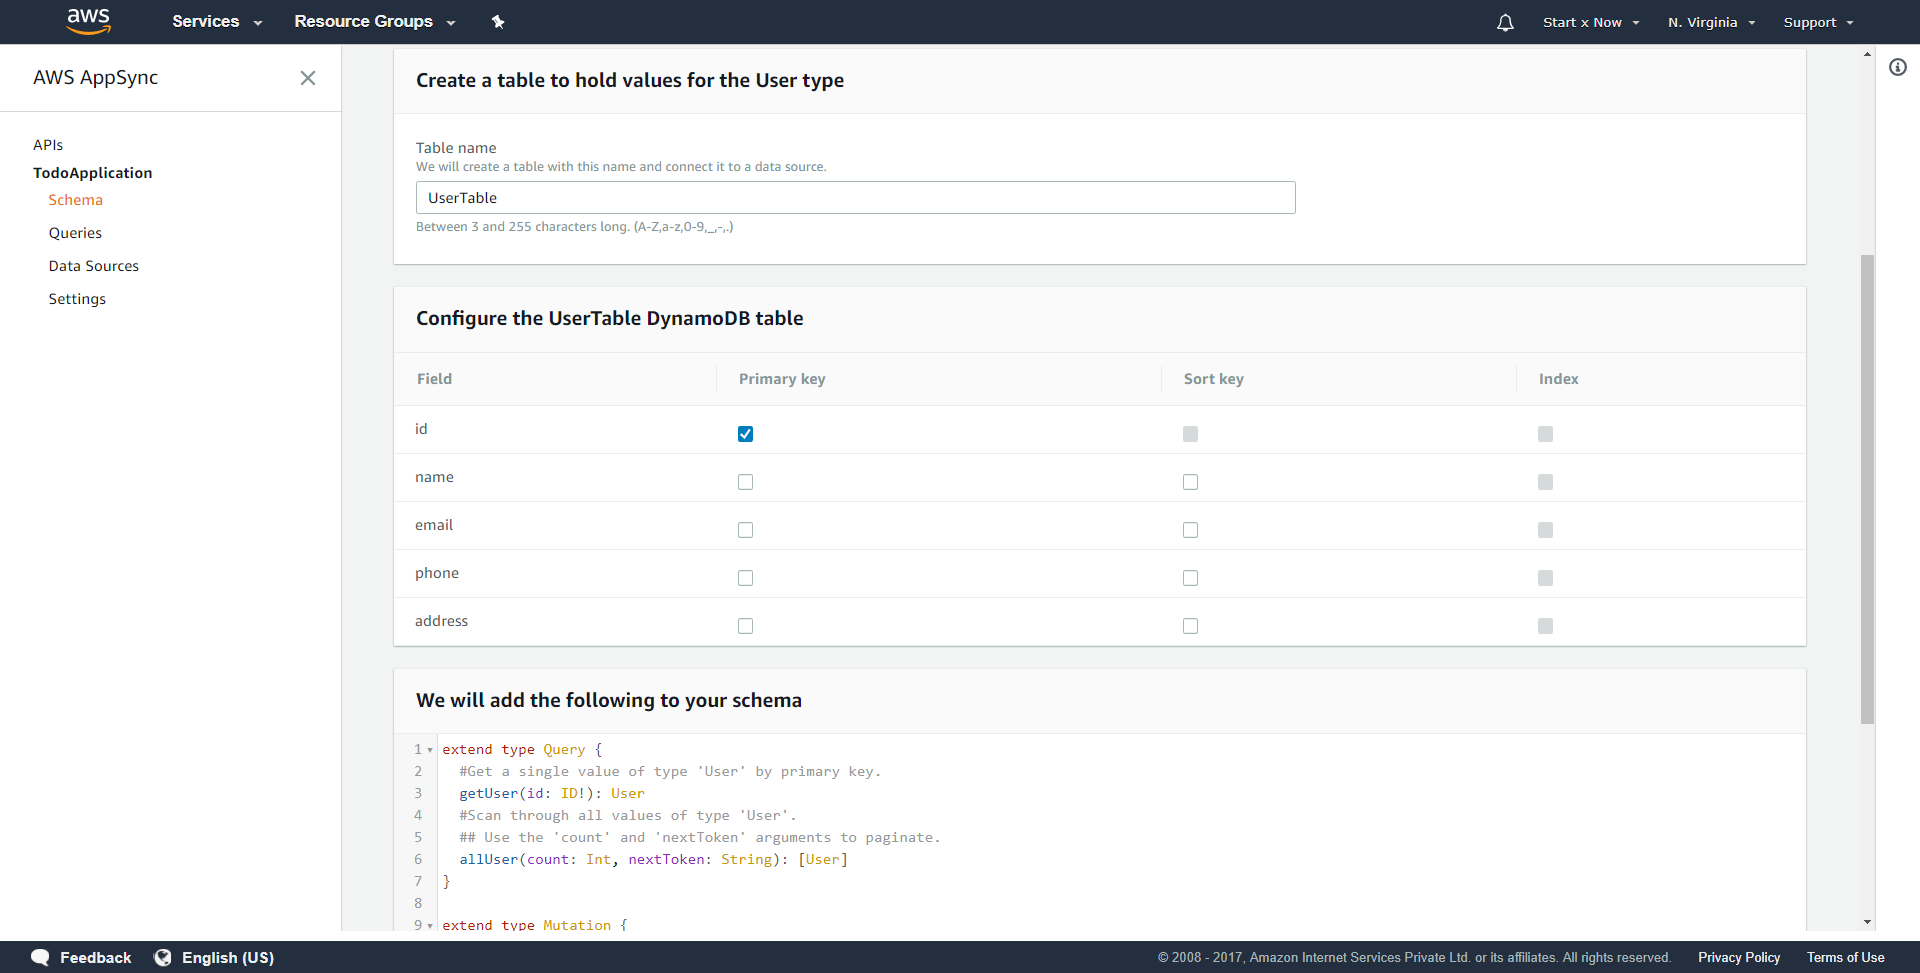
Now we can see all the information,
- Table Name: Name of the table that will be created
- Configure the UserTable DynamoDB table: Here we can see by default AWS Selected id as the primary key.
- We will add the following to your schema: The new Queries and Mutations that will be added to our API.
AWS AppSync will add two new Queries
- getUser(id: ID!): Get a single value of type 'User' by primary key.
- allUser(count: String, nextToken: String): Use the 'count' and 'nextToken' arguments to paginate.
And it will add two new Mutations
- putUser(id: ID!, name: String!, email: String!, phone: String, address: String): This will add/update user in database
- deleteUser(id: ID!): This will delete the user from database
We can see this doesn't create a password field which we need, This is not an issue as we can specify the fields dynamically.
** AWS didn't create password field automatically because we didn't specify it in the type User as I wanted to keep that field hidden.
** We won't make use of any of the queries and mutations created by AppSync, But let it be there for now. You can use it as a reference.
** UPDATE: Since updateUser mutation is created by AppSync automatically and since it matches our naming convention we will make use of it.
Click on the Create button and AWS will create all the resources for us.
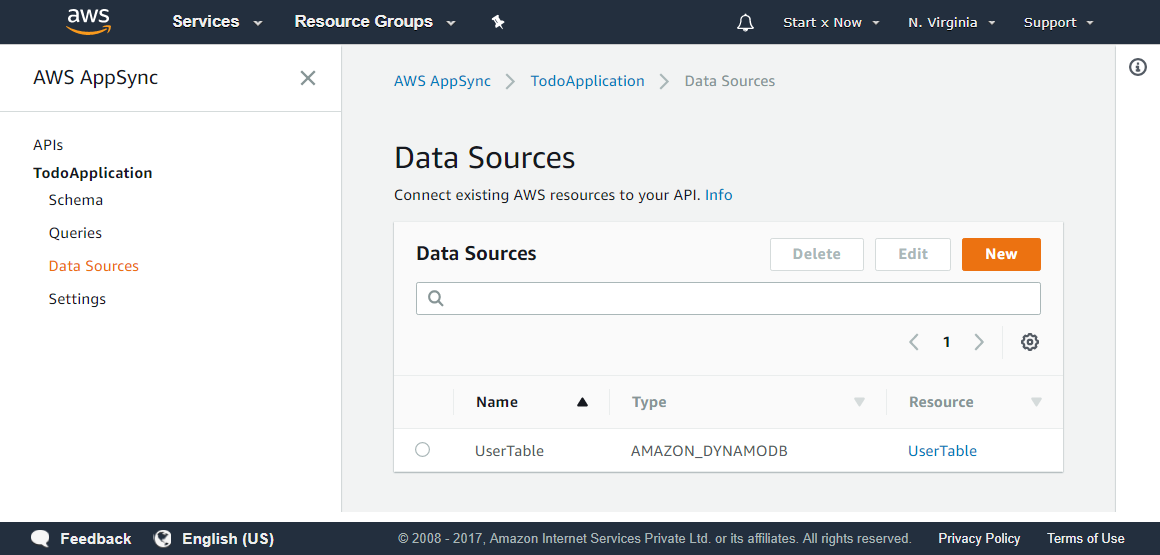
Now if you goto Data Sources Page you can see UserTable has been created for us.
Now, Let's add a new user to check if everything is working.
Click on Queries page and execute this code by clicking on the Orange Button.
mutation {
  createUser(name: "John Doe", email: "john.doe@gmail.com", password: "password123") {
    id
    name
    email
  }
}
and the result we see is
{
  "data": {
    "createUser": null
  }
}
Nothing happened, That's because we haven't linked our Mutations to the resolver (database) yet, Let's do that.
Linking our createUser Mutation to the Resolver:
Let's get back to our Schema Page and there in the Data Types filter types input enter Mutation. Now we can see all the mutations we have created.
Next to field createUser(...): User click on Attach button.
That will open a Create new Resolver page, In Data source name select UserTable
In Configure the request mapping template dropdown select PutItem and that will insert this code in the editor below it.
{
    "version" : "2017-02-28",
    "operation" : "PutItem",
    "key" : {
        ## If your table's hash key is not named 'id', update it here. **
        "id" : { "S" : "${context.arguments.id}" }
        ## If your table has a sort key, add it as an item here. **
    },
    "attributeValues" : {
        ## Add an item for each field you would like to store to Amazon DynamoDB. **
        "title" : { "S" : "${context.arguments.title}" }
    }
}
We need to focus on the highlighted code, As that's where we will enter all the fields we have added for the createUser mutation.
You might think we can do something like
"name" : { "S" : "${context.arguments.name}" },
"email" : { "S" : "${context.arguments.email}" },
"phone" : { "S" : "${context.arguments.phone}" },
"address" : { "S" : "${context.arguments.address}" }
...other fields
While this will work, We have made phone and address field optional And if the user doesn't provide data for these fields, The value of these fields will be ${context.arguments.phone} and ${context.arguments.address} respectively.
That's not what we want., We want to set content if there's content for that fields otherwise set its value as empty string "".
WELL WE CAN'T SET VALUE AS EMPTY STRINGS DynamoDB Doesn't allow that.
This took some time to figure out, I did get a little creative and found a hacky solution. We loop over all the fields sent by GraphQL and add those in the table.
This way if a field is present it will be added otherwise it will be ignored.
And we also need to generate the id field automatically., In the code below you can see I have used $util.autoId() for generating IDs automatically.
{
    "version" : "2017-02-28",
    "operation" : "PutItem",
    "key" : {
        ## If your table's hash key is not named 'id', update it here. **
        "id": { "S": "$util.autoId()"}
        ## If your table has a sort key, add it as an item here. **
    },

    #set( $expValues = {} )

    #foreach( $entry in $context.arguments.entrySet() )
    $!{expValues.put("${entry.key}", { "S" : "${entry.value}" })}
    #end

    #if( !${expValues.isEmpty()} )
    "attributeValues" : $utils.toJson($expValues)
    #end
}
Now onto Configure the response mapping template., Here select Return single item from the dropdown.
This will add the following code in editor below it.
## Pass back the result object as is. **
$util.toJson($context.result)
This is fine, We will leave this code as it is.
You will end up with code like this (screenshot below)
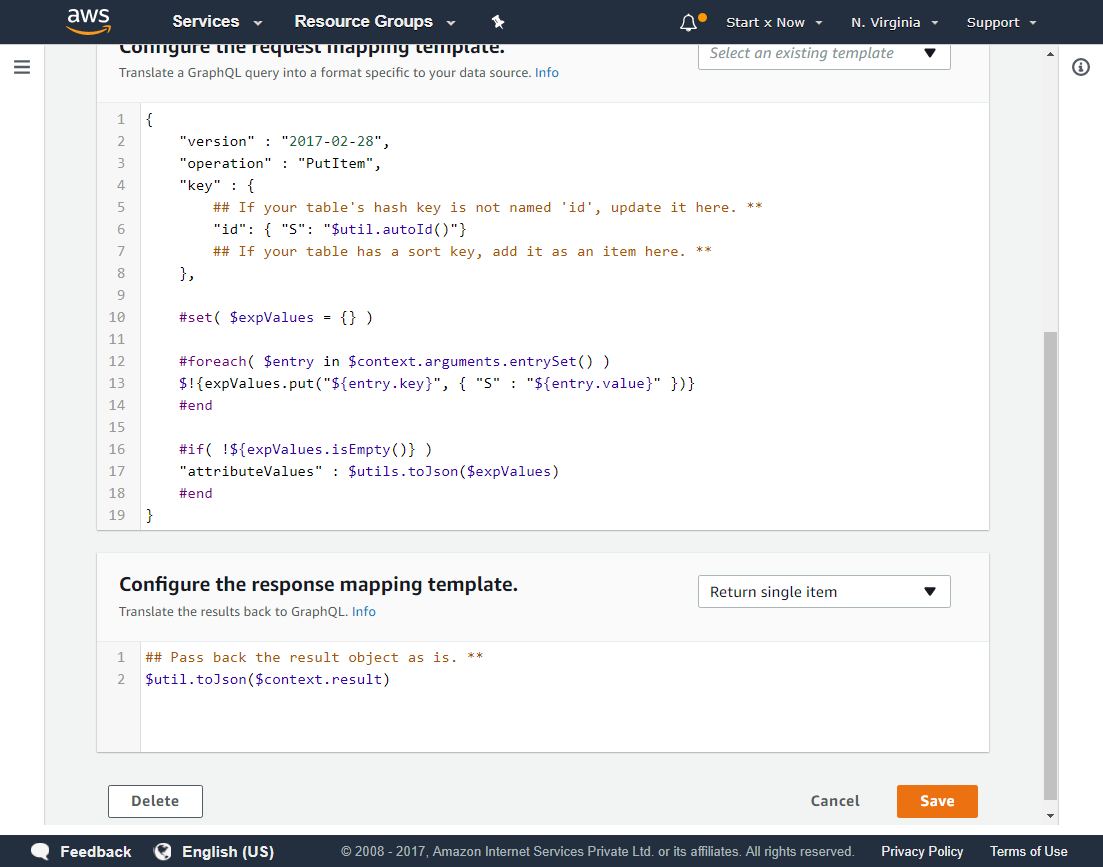
Next, Click on the Save button. This will bring you back to the schema page.
Now let's add the user again and see if it's working.
Open Queries page and enter the below code and then click on Execute Query button.
mutation {
  createUser(
    name: "John Doe"
    email: "john.doe@gmail.com"
    password: "password123"
    phone: "1234567890"
    address: "Bangalore"
  ) {
    id
    name
    email
  }
}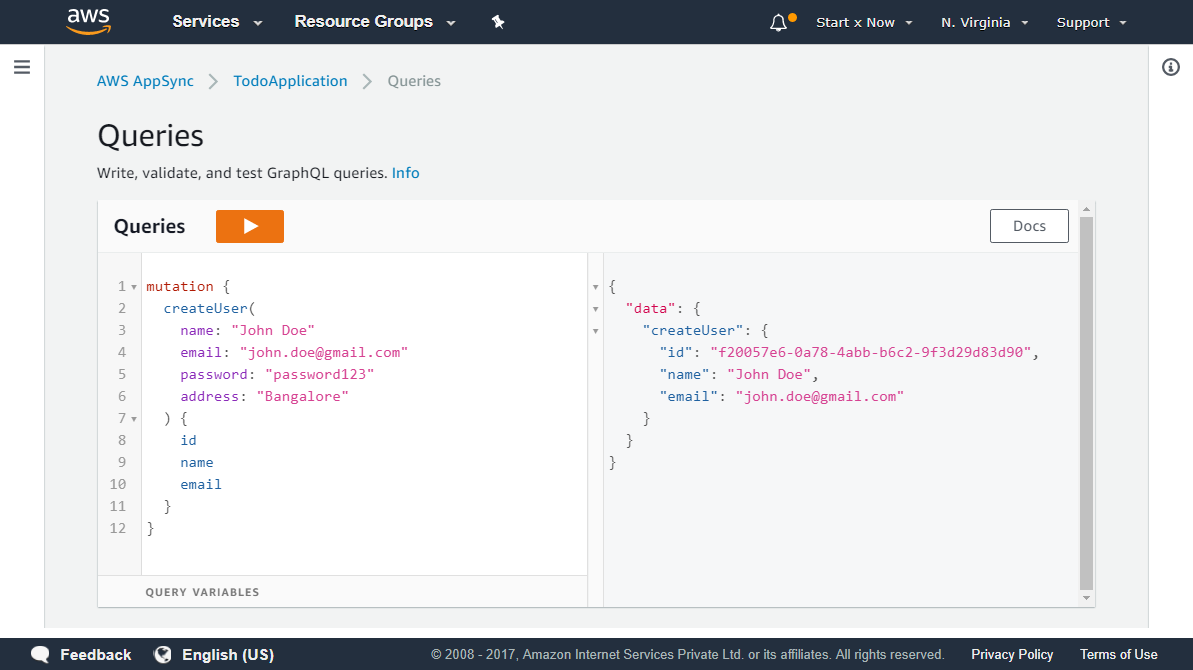
And we see our User created and saved in Database.
Let's execute this Query again (with different data) to add another user
mutation {
  createUser(
    name: "Jane Smith"
    email: "jane.smith@gmail.com"
    password: "password"
    phone: "9876543210"
  ) {
    id
    name
    email
  }
}
And that's another success.
Now let's run this query to find all the users in the database.
query {
  allUser {
    id
    name
    email
  }
}
But we see this response
{
  "data": {
    "users": null
  }
}
Why? We have two users in the database we should be able to see it.., Well it's because we haven't configured our resolver for users Query yet.
Let's do that next.
Linking our users Query to the Resolver:
Let's get back to our Schema Page and there in the Data Types filter types input enter Query. Now we can see all the queries we have created.
Next to field users: [User] click on Attach button.
Again this will open a Create new Resolver page, In Data source name select UserTable
In Configure the request mapping template dropdown select Paginated scan and that will insert this code in the editor below it.
{
    "version" : "2017-02-28",
    "operation" : "Scan",
    ## Add 'limit' and 'nextToken' arguments to this field in your schema to implement pagination. **
    "limit": #if(${context.arguments.limit}) ${context.arguments.limit} #else 20 #end,
    "nextToken": #if(${context.arguments.nextToken}) "${context.arguments.nextToken}" #else null #end
}
Thankfully we don't have to do anything here, Leave it as it is.
For the Configure the response mapping template. paste in the code below
$utils.toJson($context.result.items)It will look like this.
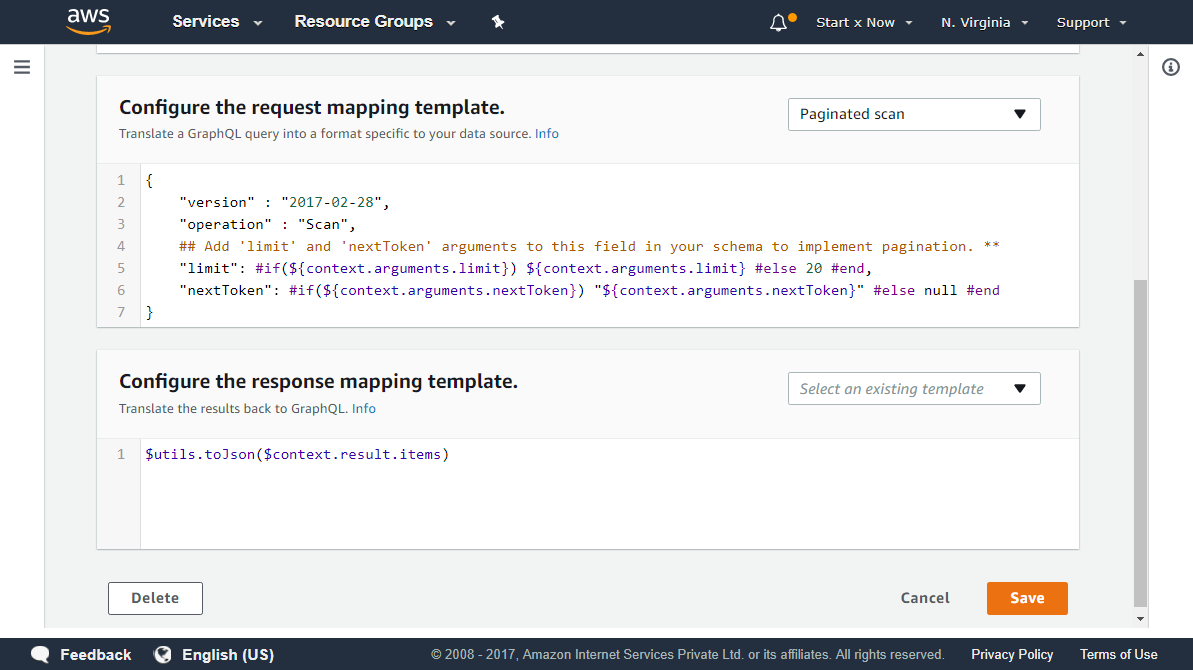
Now hit that Save button to save our changes.
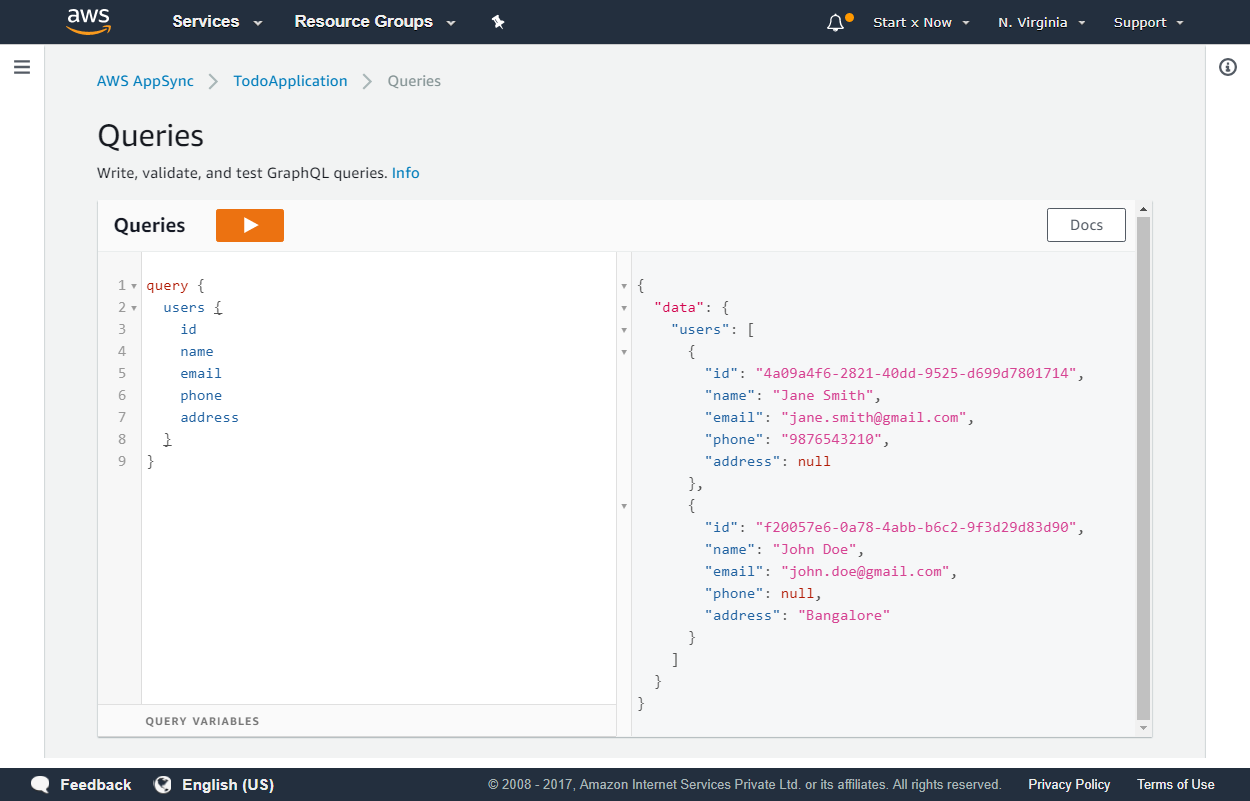
If we run our users query again
query {
  users {
    id
    name
    email
    phone
    address
  }
}
We will see this response.
{
  "data": {
    "users": [
      {
        "id": "4a09a4f6-2821-40dd-9525-d699d7801714",
        "name": "Jane Smith",
        "email": "jane.smith@gmail.com",
        "phone": "9876543210",
        "address": null
      },
      {
        "id": "f20057e6-0a78-4abb-b6c2-9f3d29d83d90",
        "name": "John Doe",
        "email": "john.doe@gmail.com",
        "phone": null,
        "address": "Bangalore"
      }
    ]
  }
}
And we're DONE!!!
Not really, These are the beginning phases, Now we have to do this for all the Queries and Mutations., But it will be easy as it will follow the same concept/codes with minor changes.
Let's tackle that in our next Tutorial.
Meta Information
December 19, 2017 at 12:30 AM, updated on December 19, 2017 at 11:33 PM and is written by Dhruv Kumar Jha (me).